Zombie Brain Cupcakes
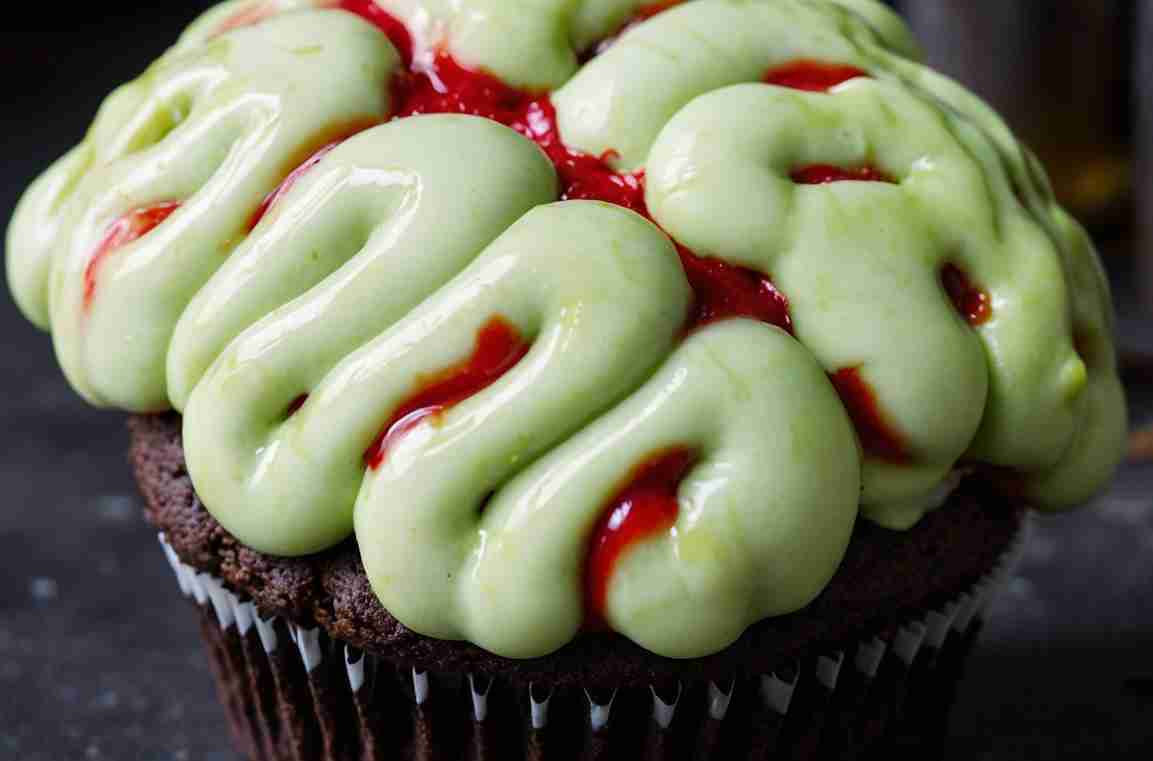
Halloween just got a lot more eerie with these delightfully creepy Zombie Brain Cupcakes! These moist chocolate cupcakes, topped with rich vanilla frosting, are transformed into spooky treats with neon green food coloring and clever piping. Perfect for your next haunted gathering!
Whether you’re hosting a Halloween bash or simply want to impress friends and family, these cupcakes offer a blend of indulgence and ghoulish fun. The red gel drizzle adds a blood-curdling finishing touch, ensuring these treats are as festive as they are delicious.
Not only are they easy to make, but the creative design will leave your guests both spooked and impressed.

Zombie Brain Cupcakes: Ingredients Breakdown
All-Purpose Flour
The foundation of these spooky cupcakes, providing structure and texture, while ensuring they rise perfectly for a soft and moist crumb.
Unsweetened Cocoa Powder
Rich and bold, this brings deep chocolate flavor, adding a dark allure to the base of these eerie treats.
Buttermilk or Whole Milk
This liquid gold creates tenderness and moisture, balancing the richness of the cocoa with a creamy softness.
Neutral Oil
A key to keeping these cupcakes moist, it adds subtle richness without overpowering the flavors.
Vanilla Extract
A hint of vanilla rounds out the sweetness, complementing the chocolate and enhancing the frosting’s creamy notes.
Neon Green Food Coloring & Red Gel
These are the stars of the show, transforming simple frosting into gory, brain-like designs, with the red gel mimicking eerie blood for a dramatic, spooky finish.
Recipe Tips
1. Piping the Perfect Brain:
To create realistic brain-like frosting, use a small round tip for your piping bag. Start by piping two straight lines down the center of the cupcake, then pipe squiggly lines on either side to mimic brain folds. If you’re new to piping, practice on parchment paper first. Keep the lines tight and irregular to add to the eerie effect.
2. Food Coloring Tips:
The key to getting that vibrant zombie brain green is to use neon green food coloring. Start with a couple of drops and mix thoroughly into your frosting. If it’s not bright enough, gradually add more until you achieve the desired hue. For the red gel “blood,” be mindful of the amount—just a few drops will ooze perfectly without overwhelming the cupcake.
3. Keep Cupcakes Moist:
Chocolate cupcakes can dry out if overbaked. Make sure to check them at the 18-minute mark by inserting a toothpick or tester in the center. If it comes out clean or with just a few moist crumbs, your cupcakes are done. Allow them to cool completely before frosting to prevent the buttercream from melting.
What to Serve with Zombie Brain Cupcakes
1. Spooky Punch:
Pair these eerie cupcakes with a creepy-themed drink like a dark cherry or cranberry punch. Add floating “eyeballs” (lychees stuffed with blueberries) or dry ice for an extra spooky touch. The tartness of the punch will balance the sweetness of the cupcakes.
2. Savory Halloween Snacks:
Serve these sweet cupcakes alongside savory Halloween-themed appetizers, such as deviled eggs decorated as “spider eggs” or stuffed mushroom “eyeballs.” The savory flavors will contrast well with the rich chocolate and sweet frosting, creating a balanced party spread.
3. Halloween-Themed Ice Cream:
A scoop of “witch’s brew” ice cream or any dark-colored, spooky-themed flavor would be an ideal companion to these cupcakes. The cold, creamy texture will complement the rich cake and frosting while adding a fun twist to your Halloween dessert table.
FAQ
1. Can I make these cupcakes ahead of time?
Yes! You can bake the cupcakes up to two days in advance. Store them in an airtight container at room temperature. Frost and decorate them the day of your event for the freshest results.
2. How can I make these cupcakes gluten-free?
Simply replace the all-purpose flour with a gluten-free flour blend that has a 1:1 substitution ratio. Make sure to check that all other ingredients, especially the baking powder and food coloring, are gluten-free as well.
3. Can I freeze these cupcakes?
You can freeze the unfrosted cupcakes by wrapping them tightly in plastic wrap and placing them in a freezer-safe container. When ready to decorate, let them thaw completely before frosting and adding the decorations.
4. What if I don’t have red decorating gel?
If you don’t have red gel, you can create your own “blood” using a mixture of corn syrup and red food coloring. This will give the same spooky effect when drizzled on top of the cupcakes.
Zombie Brain Cupcakes
Ingredients
Method
- Cupcakes
- Preheat the oven to 350°F (175°C). Prepare a standard 12-cup muffin tin by lining it with cupcake liners.
- In a large mixing bowl, combine the flour, sugar, cocoa powder, baking powder, baking soda, and salt. Whisk together until evenly blended. Incorporate the buttermilk, oil, egg, and vanilla, whisking until a smooth batter forms. Carefully add the boiling water, whisking until fully integrated.
- Distribute the batter evenly among the cupcake liners, filling each about two-thirds full. Bake for 18 to 20 minutes, or until a toothpick inserted into the center of a cupcake comes out clean. Allow the cupcakes to cool completely, approximately 1 hour.
- Frosting & Assembly
- In a large bowl or the bowl of a stand mixer equipped with a whisk attachment, combine the powdered sugar, butter, vanilla extract, and salt. Beat on medium-high speed until the frosting is smooth and bright white, about 2 to 3 minutes. Gradually add the neon green food coloring, blending until the desired shade is reached. Adjust the coloring as needed. Transfer the frosting to a piping bag fitted with a small round tip.
- Pipe a small mound of frosting, about the size of a quarter, on top of each cupcake. Then, pipe two vertical lines down the middle of each cupcake. Next, pipe squiggly lines along both sides of the vertical lines to mimic brain-like folds.
- Drizzle a small amount of red decorating gel over the top of each cupcake, allowing it to settle into the creases for a gory appearance. If not serving immediately, refrigerate the cupcakes to keep them fresh.
