Cheeseburger Meatloaf
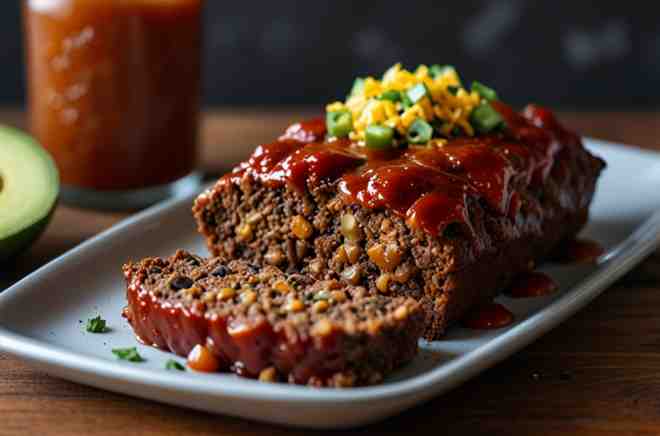
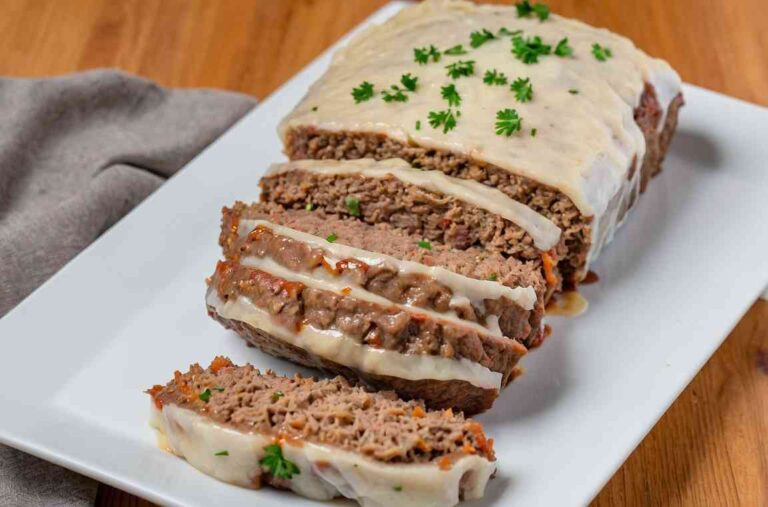
Cheeseburger meatloaf is a savory twist on a classic dish that brings the comforting flavors of a cheeseburger into every bite. Packed with seasoned ground beef, melty Cheddar, and a hint of your favorite burger toppings, it’s a surefire crowd-pleaser.
This recipe is both versatile and easy to customize. Try pairing it with traditional condiments like ketchup and mustard or go bold with Swiss cheese and sautéed mushrooms for a unique, rich flavor. Each slice reveals a delicious swirl of cheese, delivering the ultimate cheesy goodness in every forkful.
Perfect for family dinners or gatherings, this cheeseburger meatloaf adds fun, flavor, and creativity to the dinner table. Simple yet indulgent, it’s a go-to option when you want to elevate comfort food with a creative twist.
Cheeseburger Meatloaf Ingredients
- Ground Beef: The heart of this meatloaf, lending juicy, savory richness to every bite.
- Fresh Bread Crumbs: These help bind the meat, creating the perfect texture without overwhelming the flavors.
- Minced Onion: Adds subtle sweetness and depth, balancing the hearty flavors with a hint of sharpness.
- Eggs: Essential for binding, bringing the meatloaf together in a moist, cohesive texture.
- Cheddar Cheese: Melts into a gooey, flavorful center, delivering cheesy satisfaction in every delicious slice.
These key ingredients combine to make Cheeseburger Meatloaf a memorable, flavor-packed meal.

Cheeseburger Meatloaf Recipe
Recipe Tips
- Shape and Roll with Care: When spreading the meat mixture into a rectangle and rolling it up, ensure the layer is even to prevent uneven cooking. Use wax paper to help guide the roll, starting from one short end and rolling tightly. This keeps the cheese from leaking out and helps form a compact loaf that holds together well when sliced.
- Cheese Choices: While cheddar adds a classic cheeseburger taste, you can easily customize the filling with other cheeses like Swiss, mozzarella, or even pepper jack for a bit of heat. If you prefer a more intense cheese flavor, try adding a layer of cheese slices instead of shredded cheese; it’ll create an even meltier filling that oozes out beautifully with each slice.
- Use a Meat Thermometer: Cooking meatloaf to an internal temperature of 160°F (70°C) ensures it’s fully cooked without drying out. Insert the thermometer into the thickest part of the loaf without touching the cheese for the most accurate reading. This will help you avoid overcooking while keeping the meatloaf juicy and tender.
What to Serve with Cheeseburger Meatloaf
- Classic Mashed Potatoes: Fluffy and creamy mashed potatoes are a natural pairing for cheeseburger meatloaf, adding comforting textures that complement the savory, cheesy flavors. Top them with a bit of butter and parsley for a classic side that’s both filling and satisfying.
- Roasted Vegetables: Roasted carrots, green beans, or Brussels sprouts add a colorful, healthy contrast to the rich meatloaf. Toss the vegetables in olive oil, salt, and pepper, and roast until caramelized. The slight sweetness of roasted veggies balances the savory profile of the meatloaf beautifully.
- Garden Salad with Ranch or Blue Cheese Dressing: A crisp, refreshing salad with romaine lettuce, cherry tomatoes, cucumbers, and a creamy dressing offers a cool, crunchy contrast. The creamy dressing pairs well with the cheeseburger-inspired flavors, while the fresh veggies provide a light and refreshing balance.
FAQ
- Can I prepare cheeseburger meatloaf in advance?
- Yes! Prepare the meat mixture and roll it into a loaf, then cover and refrigerate it for up to 24 hours before baking. This makes it a great make-ahead meal for busy nights or entertaining.
- Can I use a different type of meat?
- Absolutely. Ground turkey, chicken, or a mix of ground beef and pork can work as substitutes. Be mindful that different meats may alter the flavor and cooking time slightly, so use a thermometer to check doneness.
- How can I prevent the cheese from leaking out?
- Leaving a small border around the edges when you spread the cheese helps. Rolling tightly and pressing the ends closed ensures that the cheese stays inside as it melts, reducing the risk of leakage.
- What’s the best way to store leftovers?
- Store leftover cheeseburger meatloaf in an airtight container in the refrigerator for up to three days. Reheat slices in the oven at a low temperature to maintain moisture, or microwave for a quick, easy meal.

Cheeseburger Meatloaf
Ingredients
Method
- Preheat the oven to 350°F (175°C).
- In a sizable bowl, combine the ground beef, bread crumbs, minced onion, beaten eggs, salt, and black pepper. Mix the ingredients thoroughly until evenly blended. Lay a piece of wax paper on a flat surface and pat the meat mixture into a 14×18-inch rectangle.
- Evenly distribute the shredded Cheddar cheese over the meat, leaving a ¾-inch border along the edges. Starting from one short end, roll up the meat in a jelly-roll fashion to enclose the cheese, forming a pinwheel loaf. Firmly press the ends of the loaf to seal in the filling. Transfer the meatloaf to a 10×15-inch baking dish.
- Bake in the preheated oven for approximately 1 hour, or until an instant-read thermometer inserted into the center registers at least 160°F (70°C), indicating the meatloaf is fully cooked.
- Let rest briefly before serving.

